
Unlock the Power of Generative AI with Divio and Amazon Bedrock: Build and Deploy Your Own Chatbot
Curious about Generative AI? It's more than buzz—it's transformative. From generating text to creating code, images, and videos its potential is vast. Discover how Amazon Bedrock and Divio can help you develop AI applications. Dive into it with us and explore the possibilities !

Evangelos Pisinas
Backend Engineer
Generative AI: Empowering Innovation
Generative AI is transforming the technological landscape, allowing machines to not just learn, but to create. This powerful technology allows machines to take on roles once thought to be the sole domain of human creativity and ingenuity. It's revolutionizing industry operations, streamlining creative workflows, and enhancing user interactions in ways that were once purely imaginative.
Amazon Bedrock: Accelerating Generative AI Development
Amazon Bedrock is a robust, emerging platform that simplifies the journey from concept to execution for Generative AI application development. It offers a unified API that provides access to top foundation models from leading AI providers. With Amazon Bedrock, you're empowered to focus on innovation and refining your applications, liberated from the complexities of infrastructure management.
Divio: Simplifying Cloud Management
While Amazon Bedrock accelerates generative AI development, Divio, an AWS Swiss Partner, provides an intuitive platform that excels in deploying and managing your applications effortlessly. By leveraging the power of containerization, Divio streamlines scaling, monitoring, and maintenance tasks, enabling developers to concentrate on enhancing their solutions. Divio ensures your applications deploy smoothly, operate reliably, and perform efficiently, simplifying the entire process for a hassle-free experience in cloud management.
The Chatbot: Crafting Your Own Interactive AI
Now, let's dive into the exciting part! By the end of this blog post, you'll be able to create and deploy your own chatbot within minutes. This isn't just any chatbot; it's designed for both general interactions and document-based inquiries, enabling you to upload documents and receive specific answers based on their content.
The chatbot is built using Streamlit, the favored Python library for crafting interactive web applications straight from Python scripts. Python excels in data science and machine learning, and Streamlit empowers developers worldwide to rapidly transform their ideas into shareable apps. It’s all about innovation and community, where support and inspiration thrive. If you're intrigued, take a moment to visit their website and explore the impressive projects that Streamlit users have brought to life.
Step 1: Accessing the Chatbot Source Code
As for our little chatbot project, we've streamlined everything for you! The full source code is available here as a public GitHub repository, so you can dive in, customize, and truly make this chatbot your own. If you're not ready to dive into the code just yet, you can also experiment with a fully deployed version of the chatbot here.
Step 2: Running the Chatbot Locally
Next, let’s spin up the chatbot locally and see it in action. You will need either Python or Docker installed on your machine to follow along. So, open a terminal and let's get started!
git clone https://github.com/divio/amazon-bedrock-chatbot-demo.git
cd amazon-bedrock-chatbot-demo
Option 1: Run the application using a Python virtual environment:
Create a virtual environment
python3 -m venv venvActivate the virtual environment (Linux / Mac)
source venv/bin/activateActivate the virtual environment (Windows)
venv\Scripts\activateInstall the required packages
pip install -r requirements.txtRun the application locally
streamlit run app.pyOption 2: Run the application using Docker:
docker build -t amazon-bedrock-chatbot-demo .
docker run --rm -p 80:80 amazon-bedrock-chatbot-demo
That's it! Open your browser and navigate to the URL displayed in the terminal depending on the option you chose.
Step 3: Setting Up AWS Authentication for Amazon Bedrock
You are immediately greeted with instructions on how to get started. First you need to sign in using an AWS Access Key.
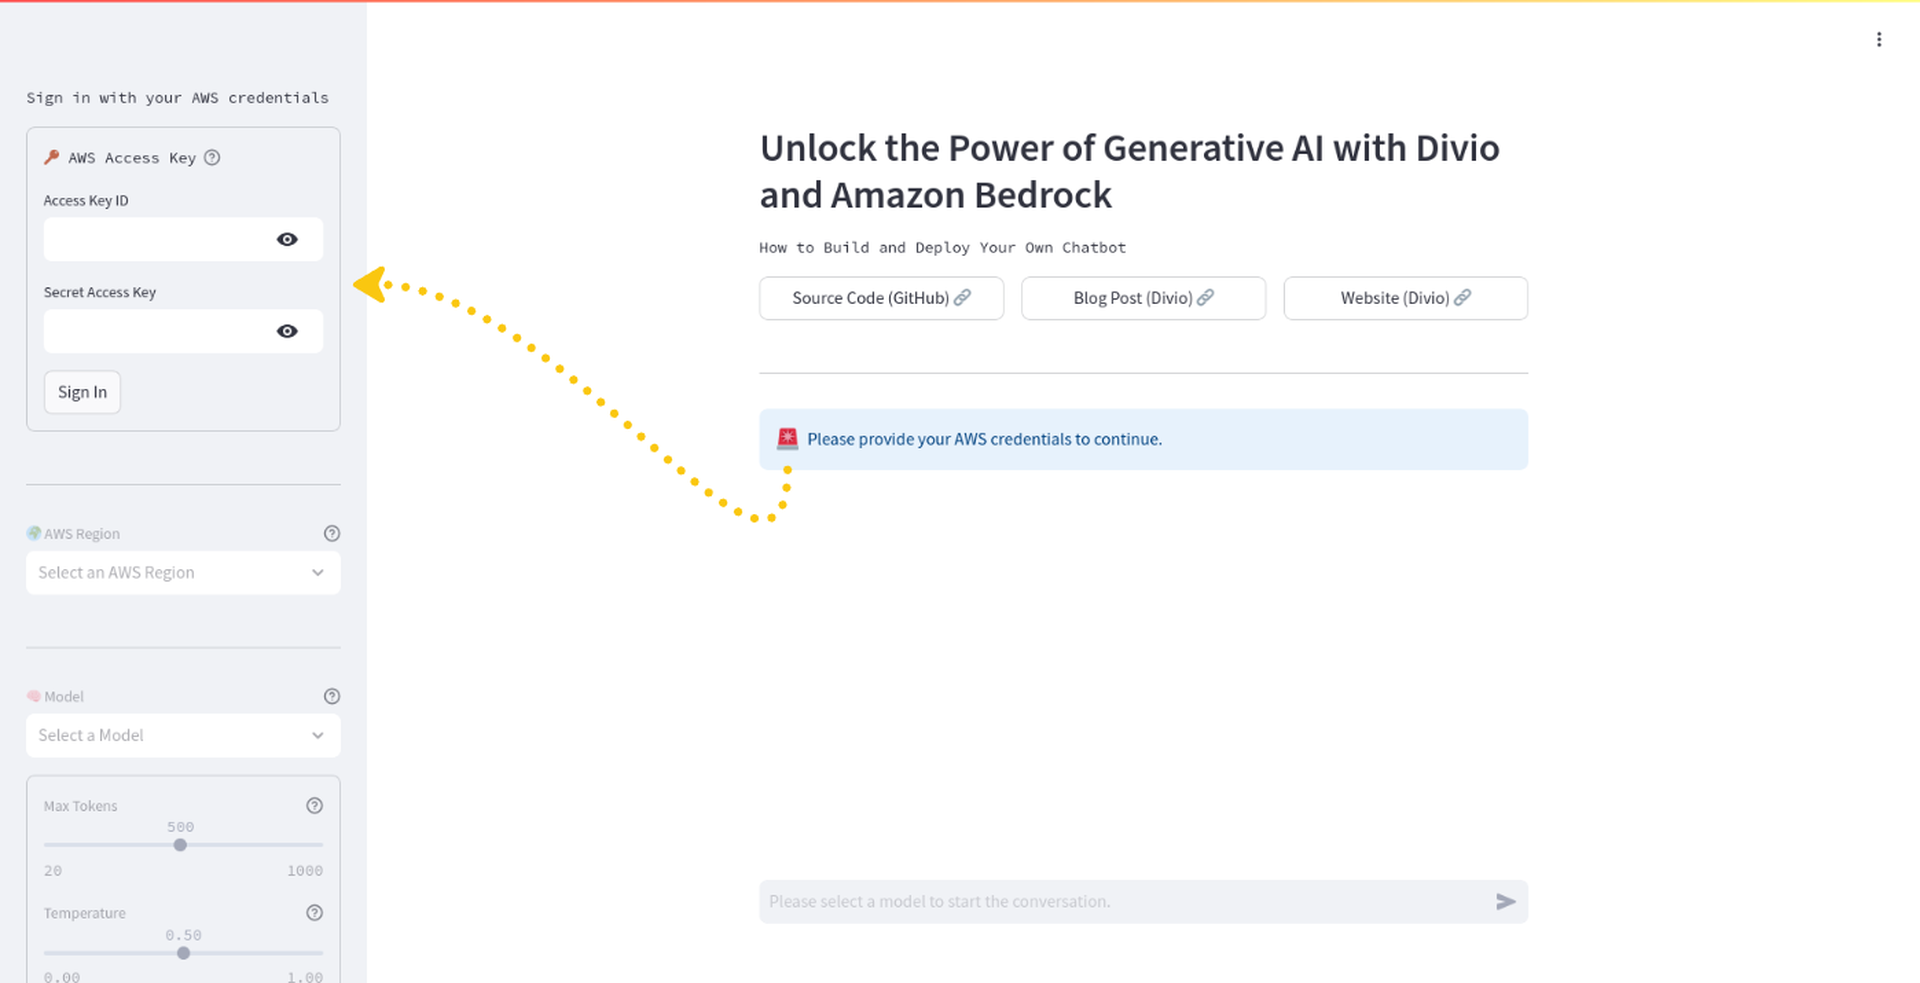
For that you'll need to:
Sign in to your AWS account as root (you can create one here)
Create a new IAM user (docs)
Attach the
AmazonBedrockFullAccesspolicy to your IAM user (docs)Create an AWS Access Key for your IAM user (docs)
The Access Key ID and Secret Access Key are the credentials you need to authenticate your chatbot with Amazon Bedrock. Once you have these, simply sign in and let's move on to the next step.
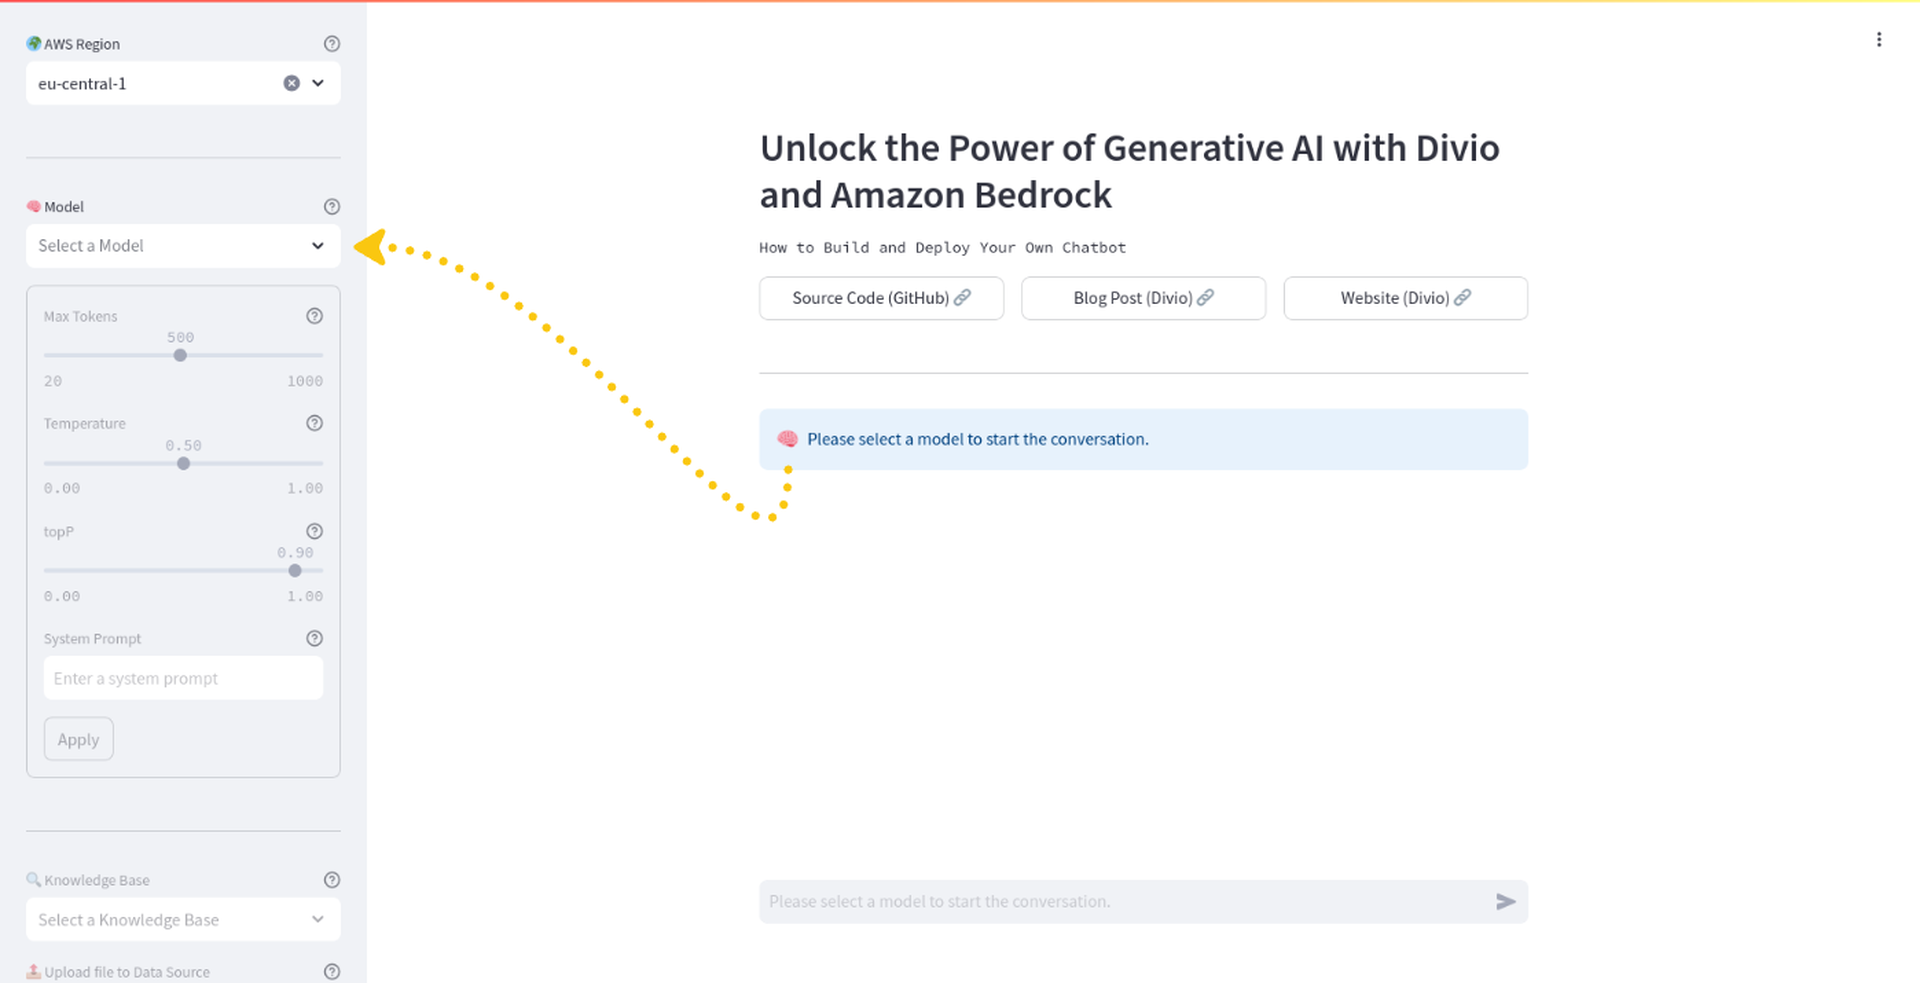
Step 4: Choosing an AWS Region and a Model
Select an AWS region. For this example, we'll use eu-central-1 (Frankfurt).
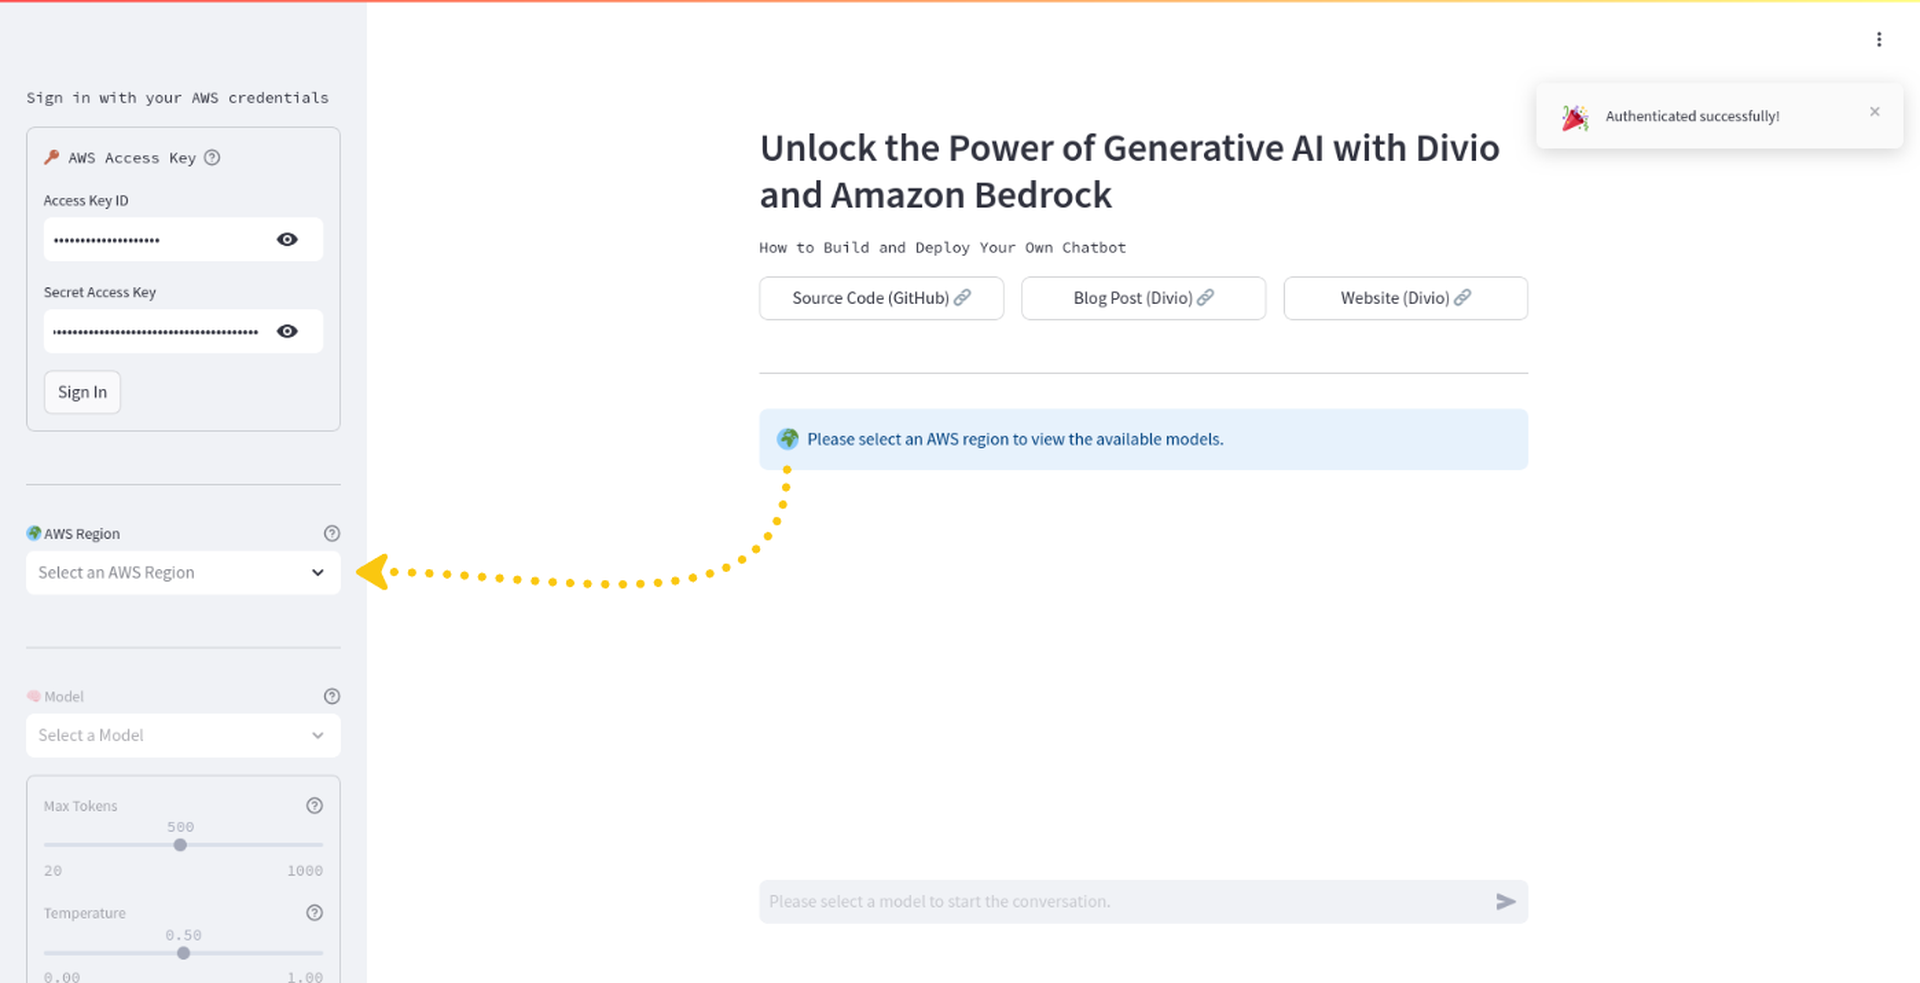
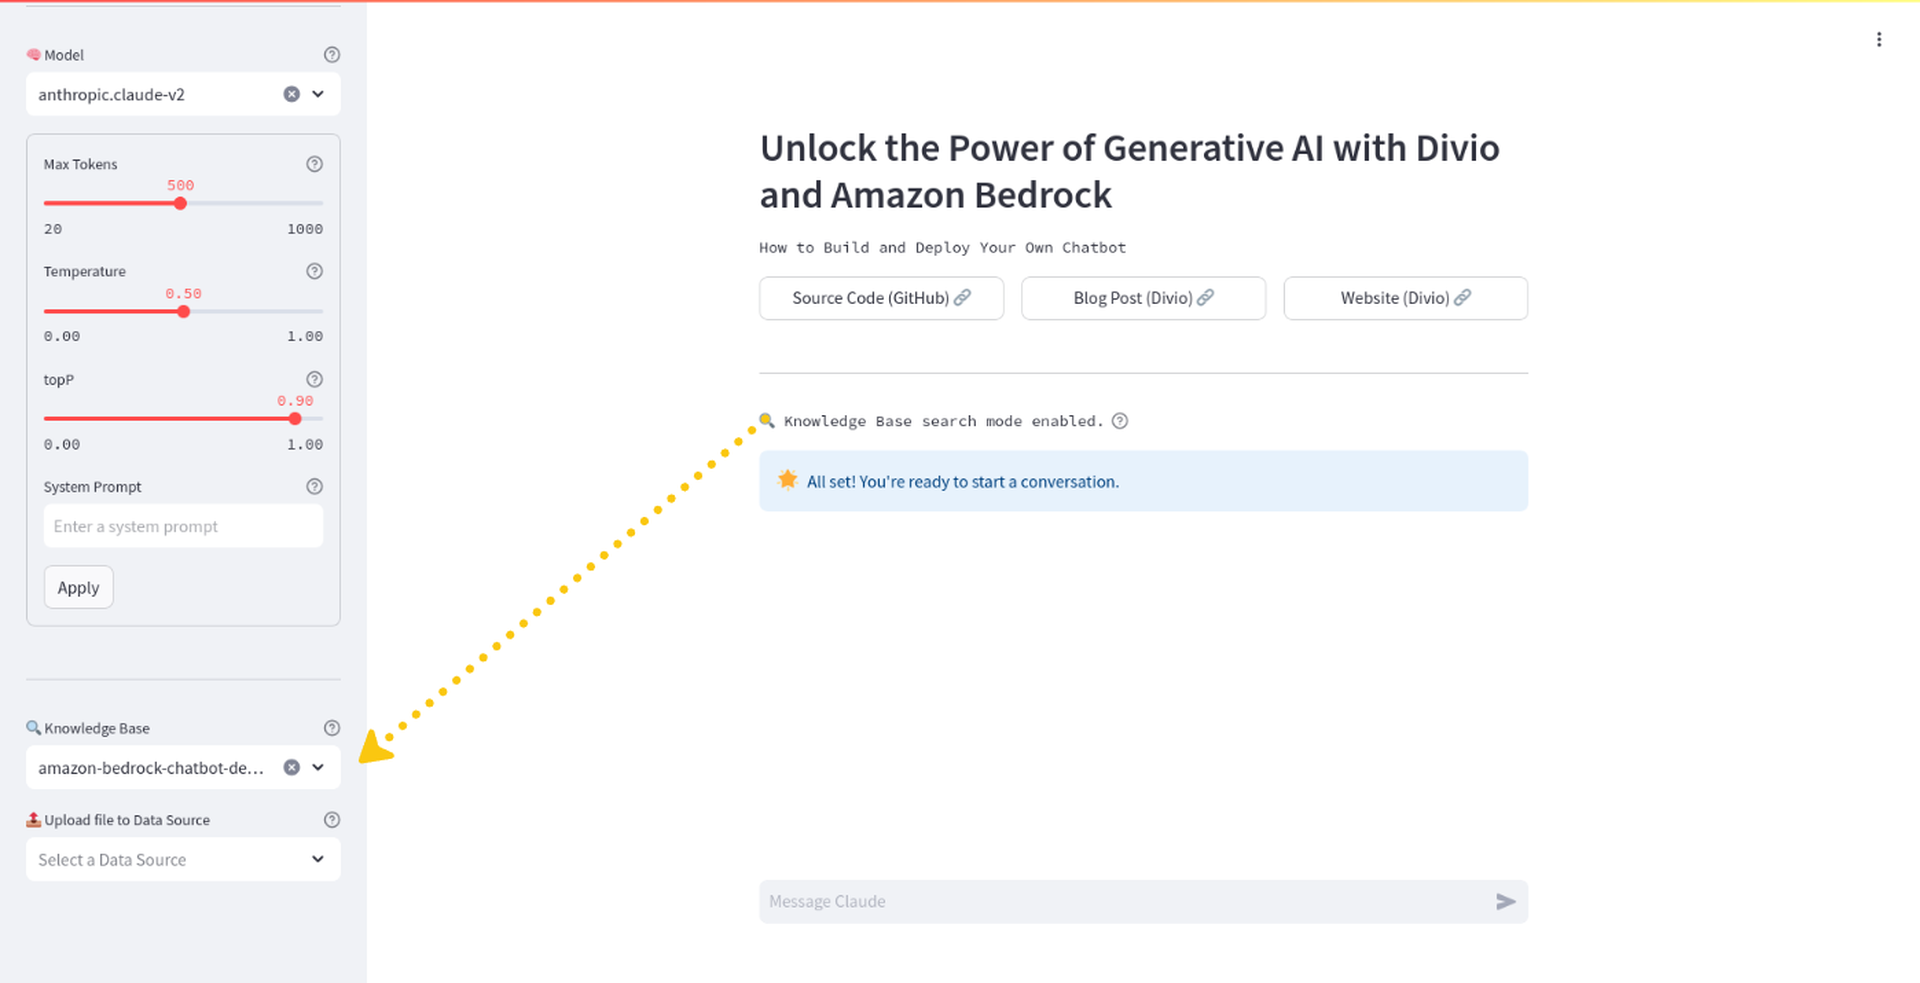
You might've already noticed that selecting a region activated the next widget for selecting a model along with some controls for that model. Hover over the help icons for each of those controls to get more information on what they do. All of the models correspond to those available for the selected region. For this example, we'll use anthropic.claude-v2.
Step 5: Granting Access to Your Chatbot Models
There is still one last step before you can start chatting with your chatbot. All of these models require access to be granted, which can easily be done through the Bedrock console. You can find the instructions on how to do that here. It might sound intimidating, but it's actually quite straightforward. For most of the models, access is granted almost instantly.
Done? Then you're all set! Let the chatting begin!
IMPORTANT! Depending on the model, AWS will charge you based on usage. Although we might talk about pennies here, it's always good to keep an eye on the costs as pennies can easily turn into dollars if you're not careful. For text-generation models, such as those we are using here, you will be charged for every input token processed and every output token generated. For more information on pricing, have a look here.
I'm sure you're excited to see your chatbot in action, but there's still one, even more exciting feature to explore. You might have noticed one last widget at the bottom, the Knowledge Base selector. What is it? Let's dive into it.
Step 6: Making the Chatbot Aware of Your Personal Documents
Understanding Amazon Bedrock's Knowledge Base
Amazon Bedrock introduces the concept of a Knowledge Base, which is essentially a collection of data sources that can be used to provide context to your foundation model.
For use cases such as Retrieval Augmented Generation (RAG), aka the magic behind our last widget, knowledge bases handle all the complexities for you in the background. RAG is for sure a concept worth exploring. For those of you who feel adventurous, have a look here.
Setting Up Data Sources
A data source on the other hand can be a variety of things such as an S3 bucket, a web crawler and more. For this example we'll focus on S3 buckets, the good old S3 buckets we all know and love that can now be loaded with all sorts of documents and be connected to your knowledge base. This is a powerful feature that can be used to create chatbots that can answer questions based on the content of your private resources. How cool is that?
Prerequisites for Creating a Knowledge Base
There are a few prerequisites you need to take care of before you can create a knowledge base with an S3 bucket as a data source.
You need to:
Attach the
AmazonS3FullAccesspolicy to your IAM user (docs)Create an S3 bucket (docs)
Attach the
IAMFullAccesspolicy to your IAM user (docs)
Please note that we are giving our IAM user too much power here. This is just for the sake of simplicity. In a real-world scenario, you would want to follow the principle of least privilege and only grant the necessary permissions. For example, there is no need for full access to all S3 buckets, just the ones you want to use. The same applies tenfold for the IAMFullAccess policy. This one is added just to avoid an issue while creating the knowledge base and it is related to creating an IAM role that will handle the permissions for the actions performed by the knowledge base. You can, and probably should, remove the IAMFullAccess policy after the knowledge base is created. The other two (AmazonBedrockFullAccess and AmazonS3FullAccess) are needed for the chatbot to function properly. As a side note, root users cannot create knowledge bases and this is the reason behind the hustle of creating and properly configuring this IAM user.
Creating the Knowledge Base
Let's move on to actually creating the knowledge base using the Bedrock console. Search for Amazon Bedrock in the AWS Management Console and click on it. Next, click on Get started and you will find yourself in the main dashboard of the Bedrock console.
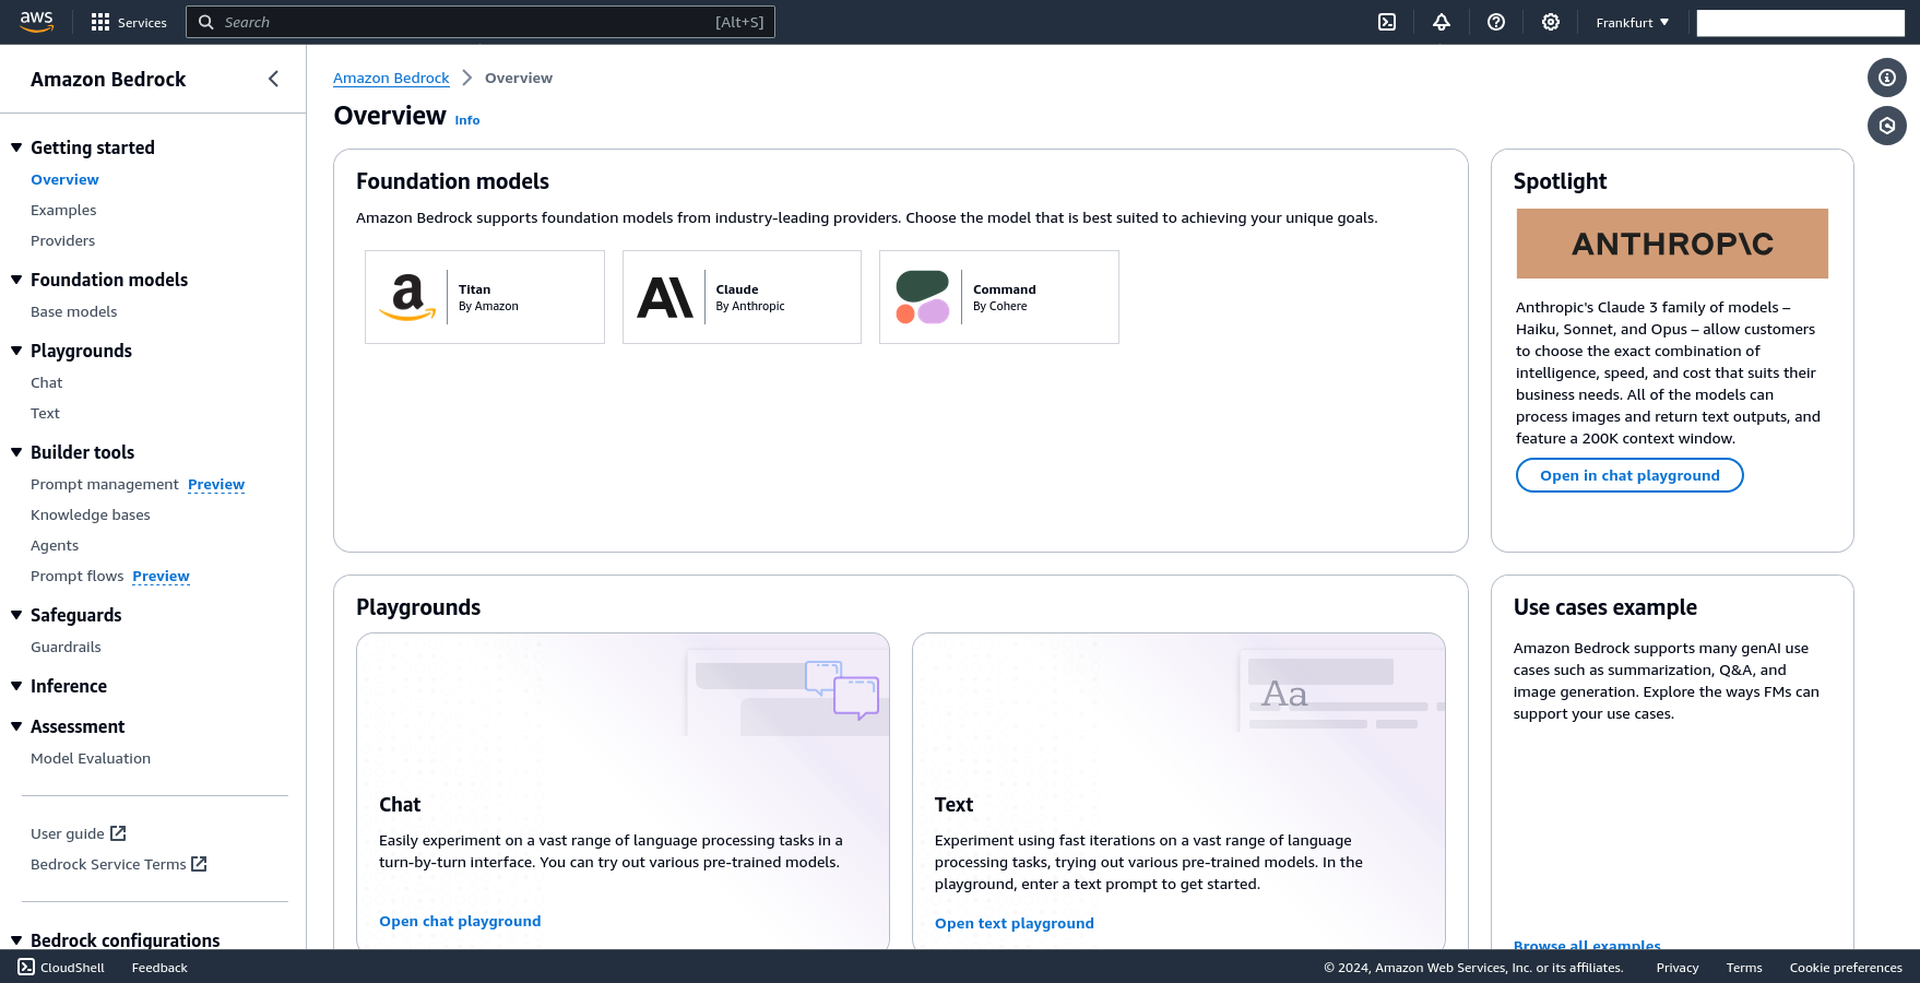
Click on Knowledge bases in the left-hand menu and then on Create knowledge base.
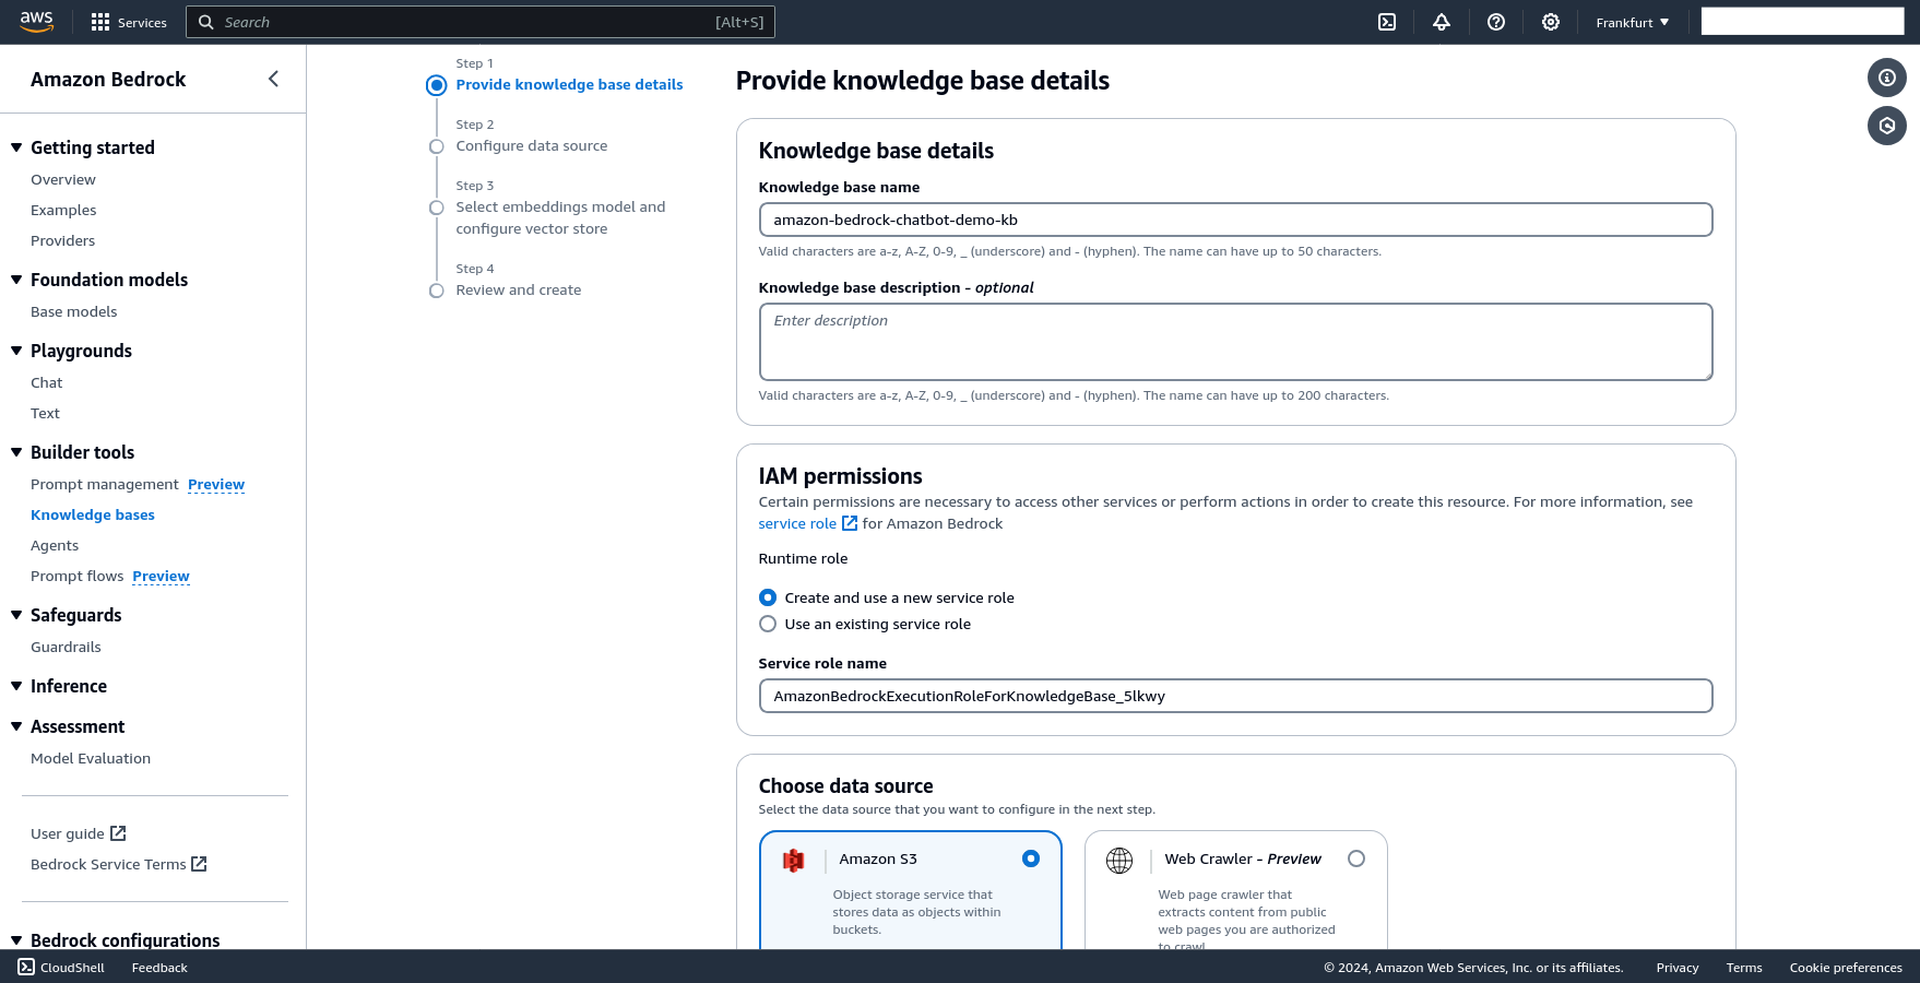
Step 1: Providing the Knowledge Base Details
You can give your knowledge base a name and a description (optional) but other than that, proceed with the default settings as shown below. Notice that Amazon S3 is selected as the data source type. Hit Next.
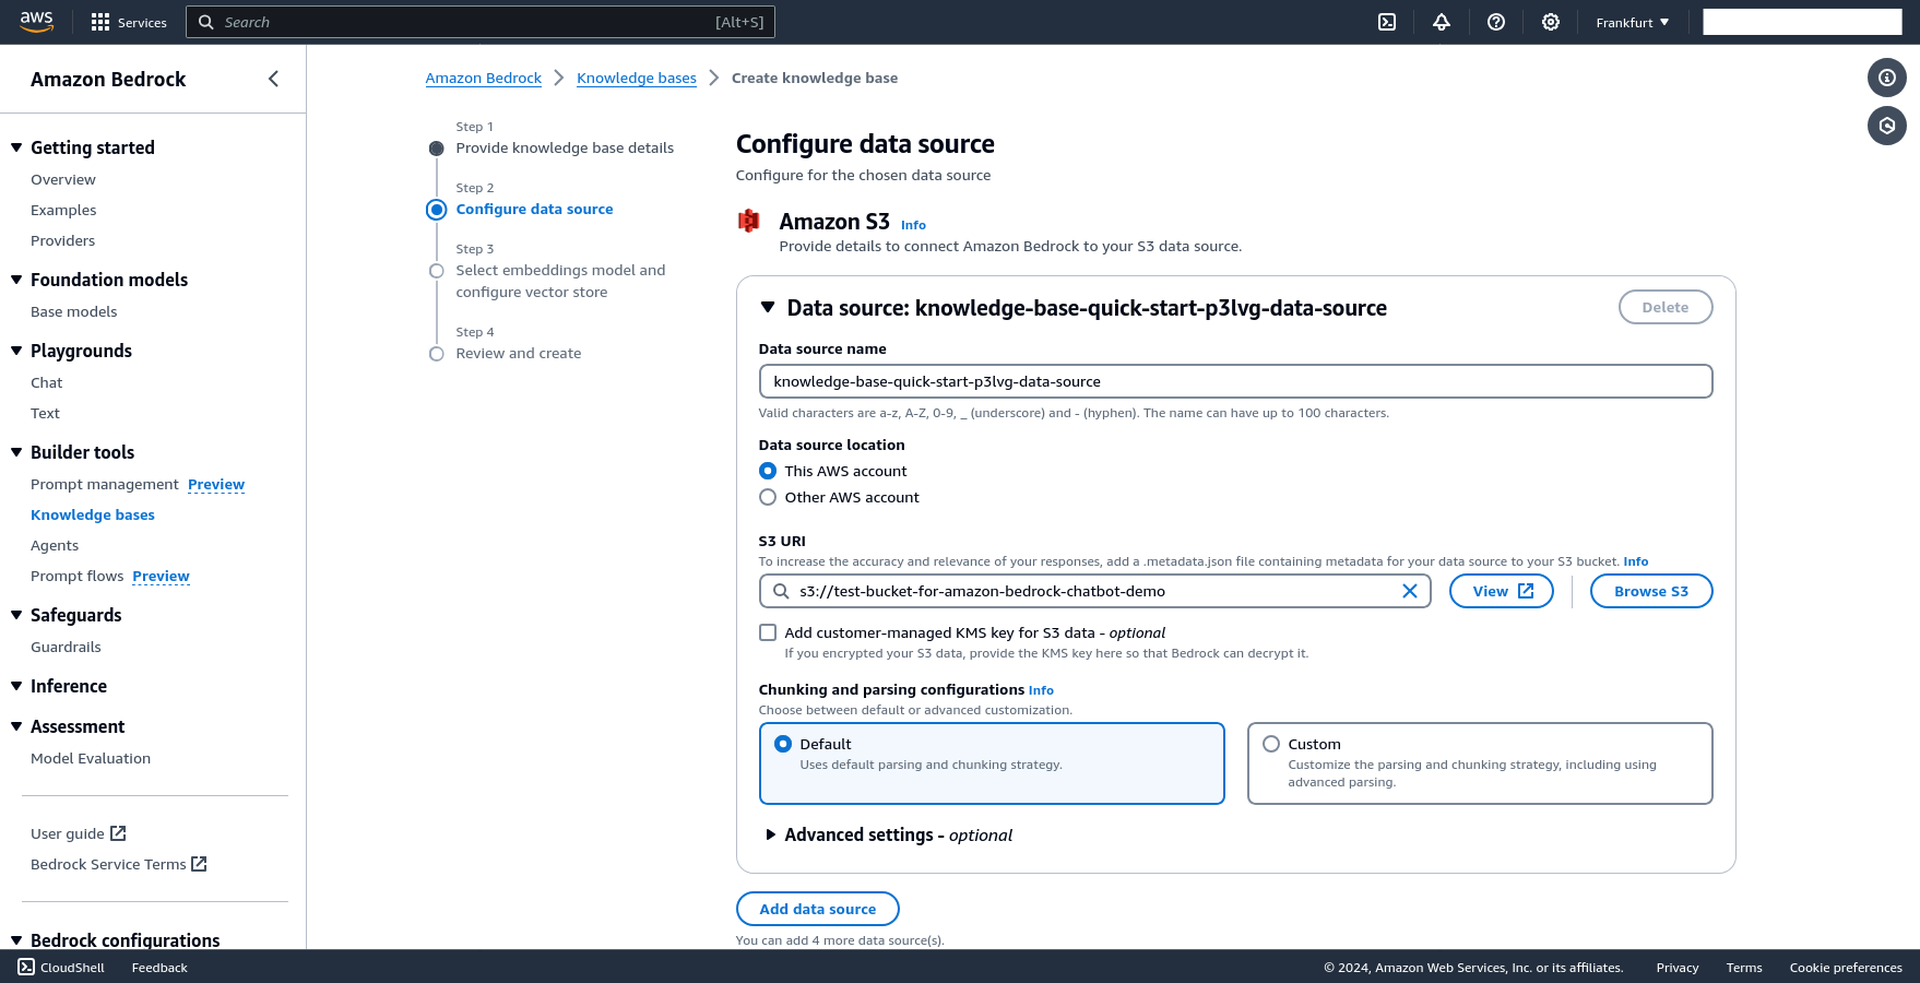
Step 2: Configuring the Data Source
Click on Browse S3 and select the bucket you created earlier. Once again, proceed with the default settings for the rest of the options as shown below.
Step 3: Selecting an Embeddings Model and Configuring the Vector Store
This is probably the most demanding step in terms of configuration. Select one of the available embeddings models. For this tutorial, we'll go on with the default one provided by Amazon (`Titan Embeddings G1 - Text v1.2`). You are free to select any other model but we would strongly suggest sticking with the default one as some of the next steps will depend on it.
Step 4: Choosing a Vector Store
Now, for the Vector database section, you can either proceed with the default one provided by Amazon (`Amazon OpenSearch Serverless vector store`) or create your own. Although the default one seems tempting, there are some caveats to it. Amazon is, at the time of writing, actively improving the pricing algorithms for this service but it might still be a bit expensive for simple use cases such as our own. For more information, have a look here.
That being said, we will proceed using Pinecone as our vector store and leverage their free tier, which is more than enough for our use case. To be able to do so, you need to create a Pinecone account first. Visit their website here and sign up. Once you have an account, log in and create a new index. To do so, select Indexes from the left-hand menu and then click on Create index.
Step 5: Configuring Pinecone Index
Give your index a name and proceed with the rest of the configuration as shown below.
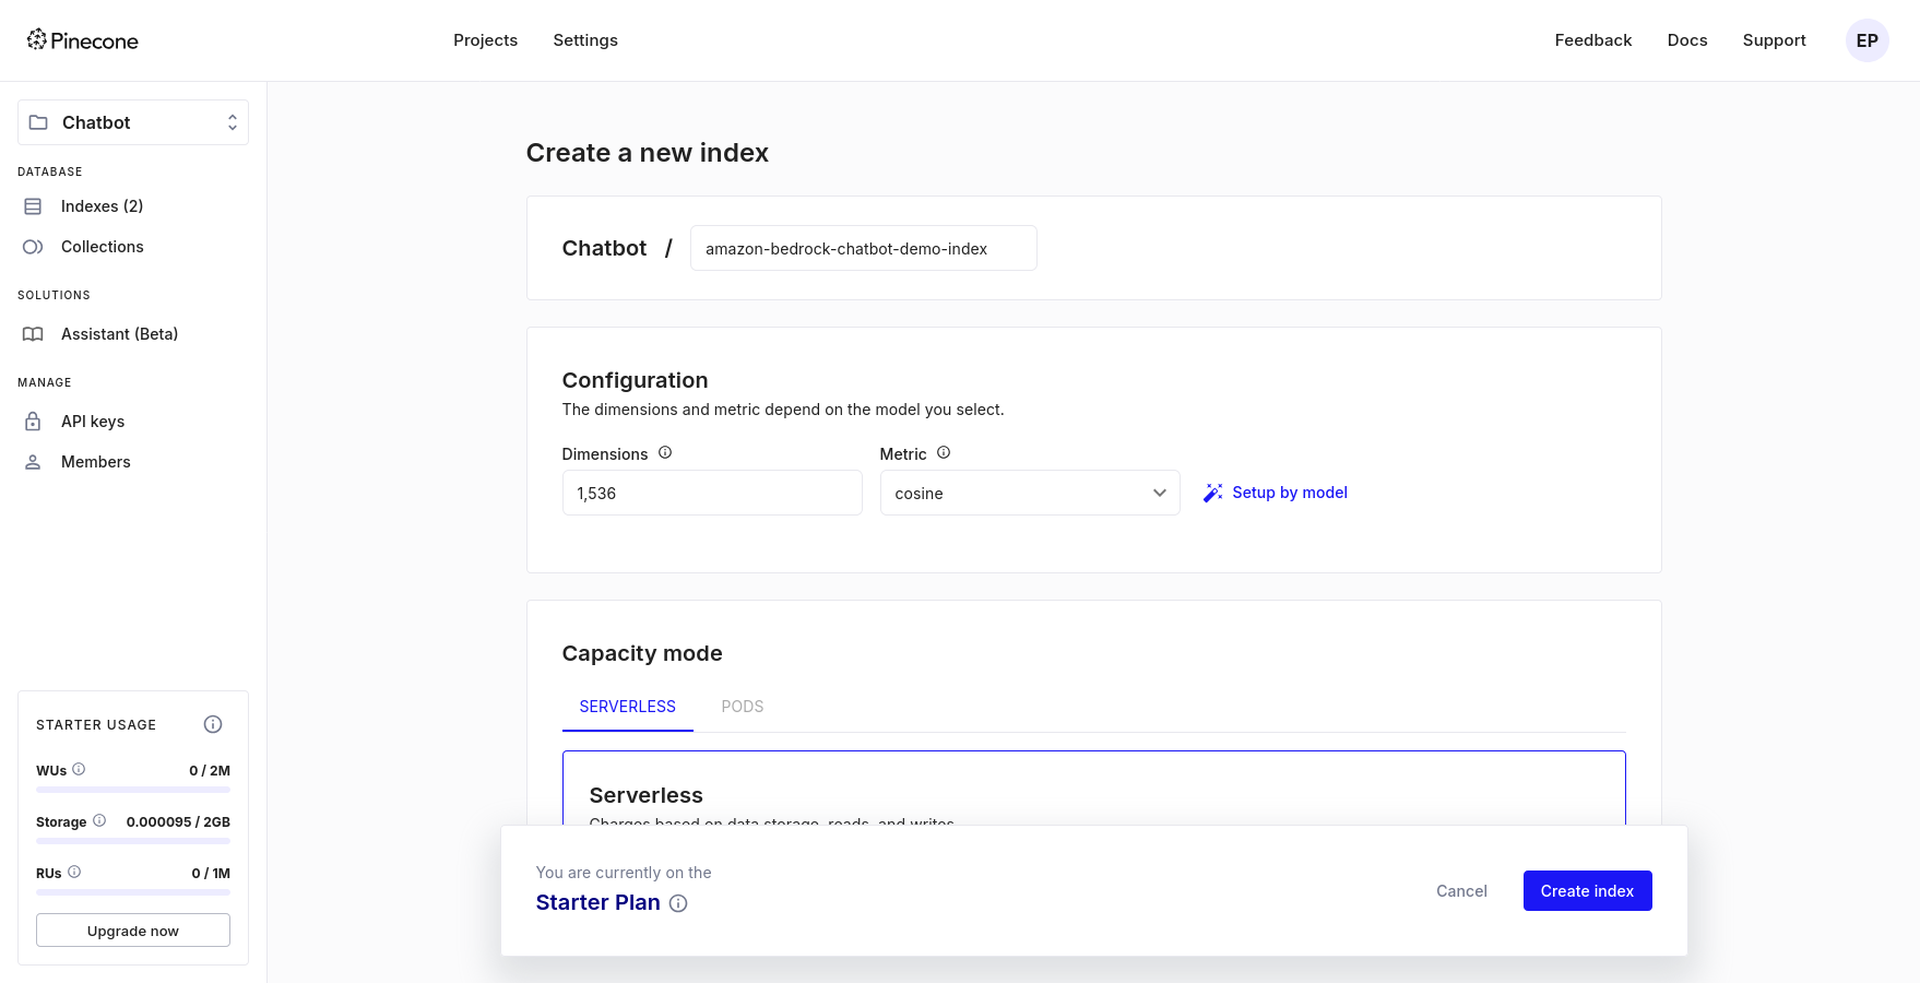
Notice the value of the dimension field (1536 in this case). This is the exact same value as the one in the vector dimensions field for the Titan Embeddings G1 - Text v1.2 model back in the Bedrock console. This is not a coincidence. The vector store needs to have the same dimensionality as the embeddings model. This is crucial for the RAG technique to work properly.
Step 6: Integrating Pinecone with Bedrock
Hit Create index. Once the index is created, copy the Host value at the top and head back to the Bedrock console. We know a lot of back and forth but we're almost there.
Paste the Host value in the Endpoint URL as shown below.
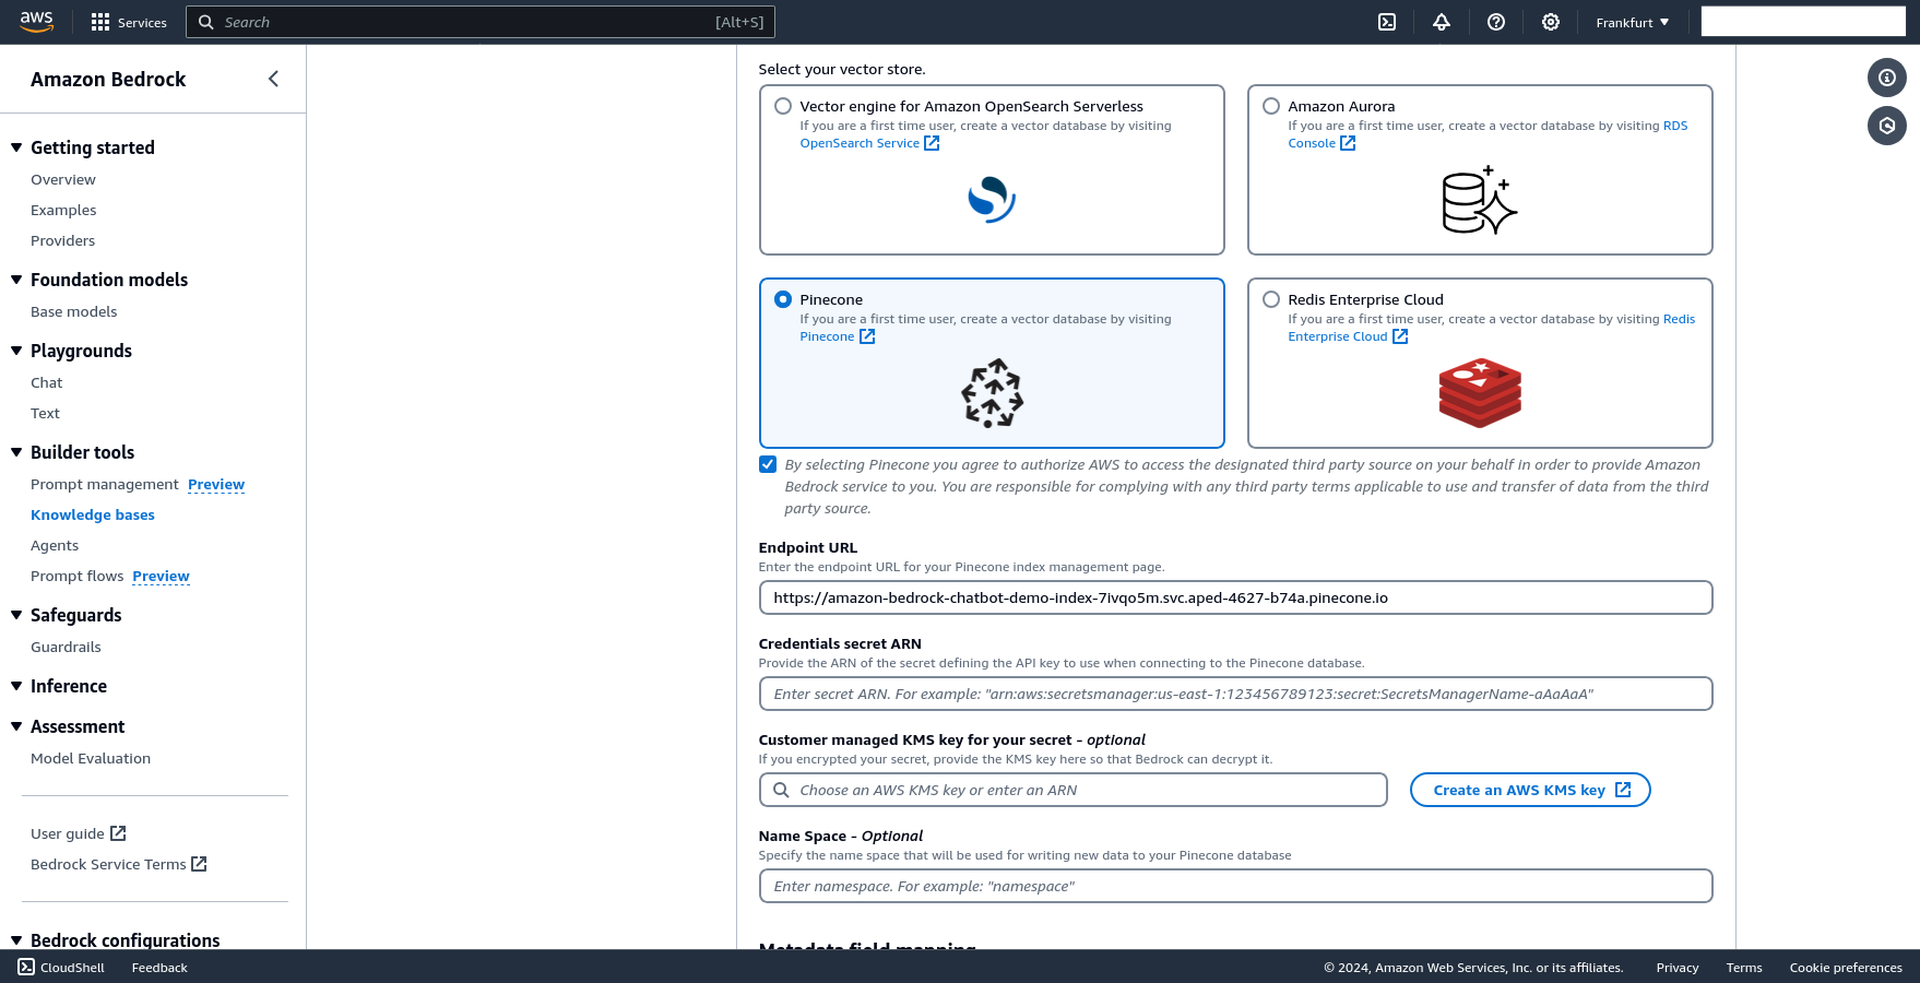
For the next field (`Credentials secret ARN`), you need to create a secret in AWS Secrets Manager. This secret will hold the API key for your Pinecone index in an encrypted form. To do so, search for Secrets Manager in the AWS Management Console and click on it. Next, click on Store a new secret and select Other type of secret. For the Key/value pair, it's crucial that the key is apiKey spelled exactly like that. For the value, paste the API key you got from Pinecone. Hit Next and follow the rest of the steps to create the secret. Once the secret is created, copy its Secret ARN and paste it in the Credentials secret ARN field back in the Bedrock console.
Step 7: Finalizing Vector Store Configuration
Use the default values suggested for the last two required fields:
Text field name:
textBedrock-managed metadata field name:
metadata
and hit Next.
Step 8: Creating the Knowledge Base
Make sure everything is set up as expected and hit Create knowledge base.
That's it! You've just created your first knowledge base. It might take a few minutes for the knowledge base to be fully created. Once it's ready, head back to the chatbot and select your newly created knowledge base from the selector.
Step 9: Utilizing the Knowledge Base
Knowledge base search mode is now enabled. In this mode, the chatbot will only respond based on the context of the documents in your knowledge base. If no relevant information is found, the chatbot will respond with a generic message stating that it cannot assist you with that request. Try it out and see for yourself. But that's not interesting, right? Let's upload a document and see how the chatbot can help us with it.
Step 10: Document Upload and Synchronization
Right below the knowledge base selector, select a data source (the S3 bucket you created and attached to the knowledge base earlier) and upload a document.
Hit Upload & Sync.
This is kind of a magical moment. The document is being uploaded to the S3 bucket and then processed by the knowledge base. In other words, perhaps in a more anthropomorphic analogy, the document has been read and understood by the chatbot. Go ahead and ask a question related to the document you just uploaded!
Deploying Your Chatbot
Now that you have your chatbot up and running, you might want to share it with the world. You can easily deploy your chatbot using Divio. Have you noticed the Dockerfile included in the repository? Well, we hope you haven't already grabbed your pen and paper to follow along with a complicated deployment process because that's all you need. Yes, you heard it right, just a simple Dockerfile like this one and you're good to go.
Step 1: Create a Divio Account
First, if you don't already have one, create a Divio account by signing up here. Once registered, log in to proceed.
Step 2: Creating and Configuring a New Application
Create Application: Click on the Plus icon (+) in the left-hand menu to create a new application
Repository Setup: Select
I already have a repository. You can fork the repository provided in this blog post and use it freely as your own. For more information on how to fork a repository, have a look hereConnect Repository: Select either "Connect to GitHub" or "Provide a git URL". Both are fine but let's go with the latter for simplicity here. The wizard will guide you through all the necessary steps. For more information and all the available ways to connect a repository with your Divio application, have a look here
Application Details: Name your application and choose a plan.
Free Trialis selected by default. Expand theCustomize Subscriptionsection to confirm. Leave other settings as default.Finalize Creation: Click
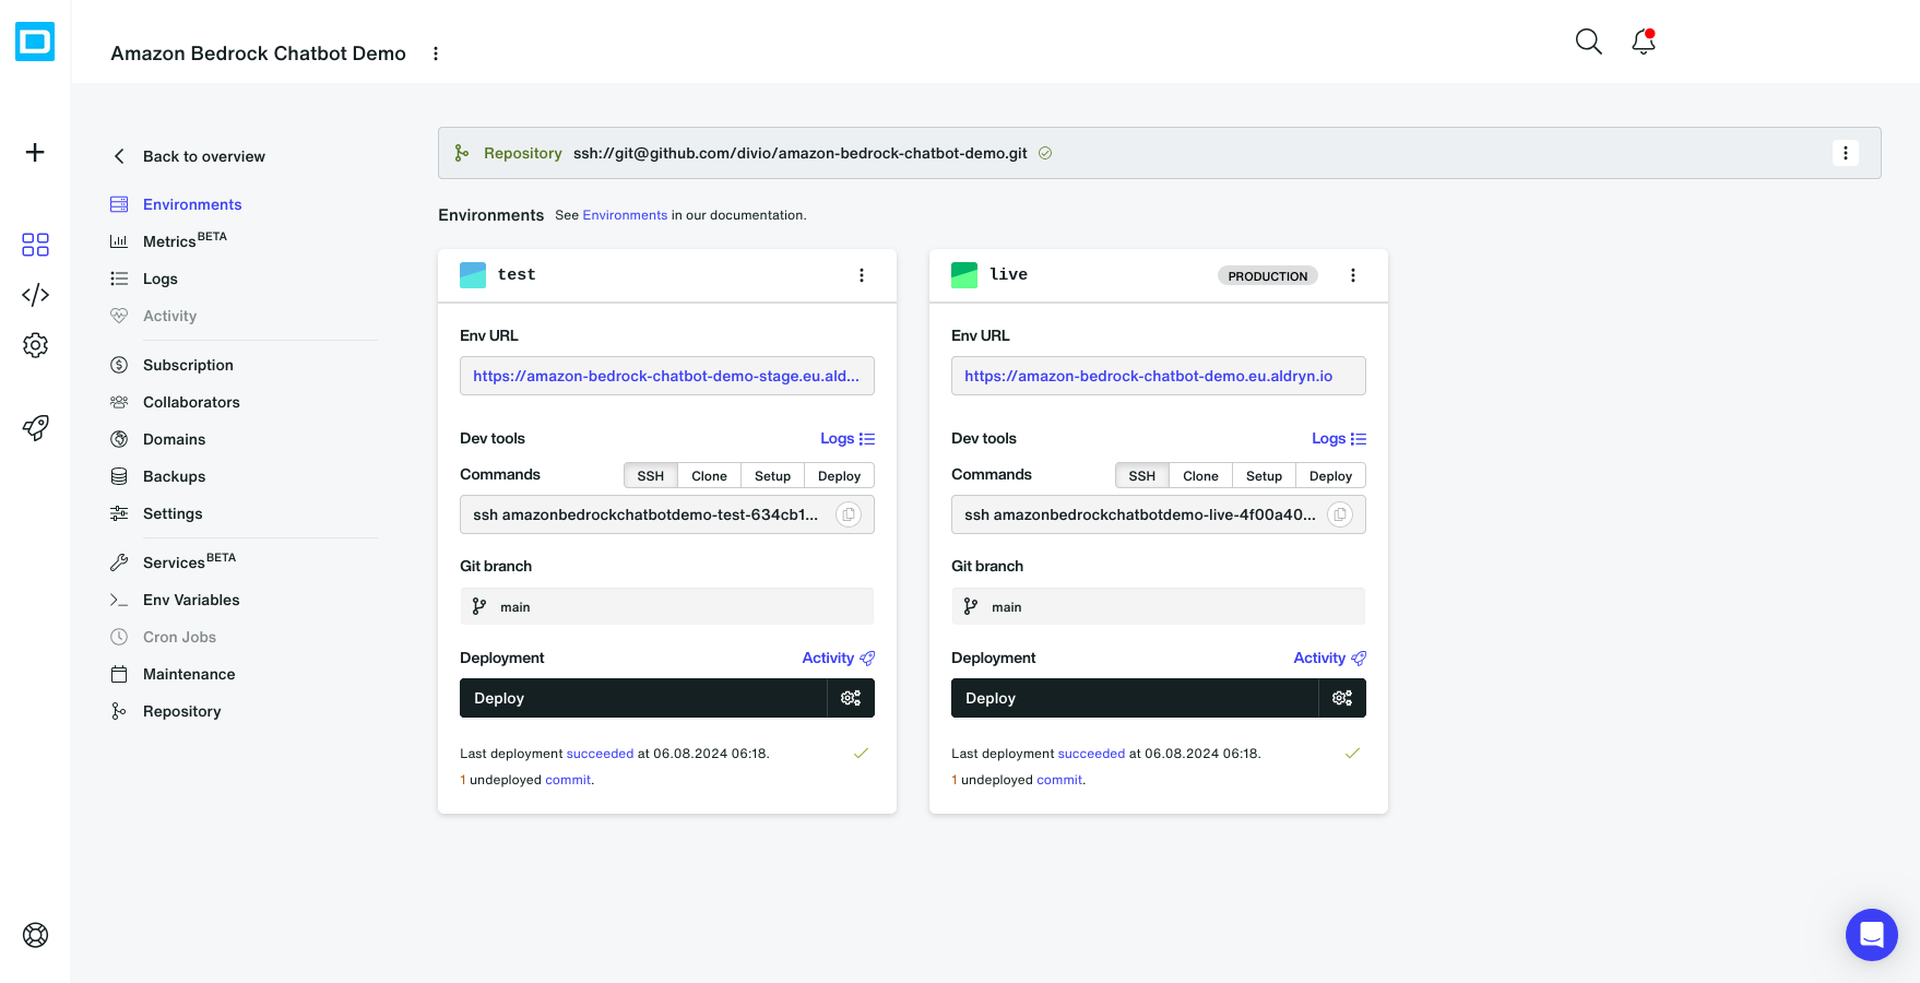
Create applicationand you're done. You will end up in the main view of a Divio application which looks like this:
Step 3: Configure Webhook (Optional)
Connect a Webhook to your repository (optional). From the left-hand menu on your application view click on Repository and add a new webhook. After completing the required steps, you will have a webhook set up. This will allow Divio to listen for changes in your repository and automatically include those changes in each new deployment. For more information on how to set up a webhook, have a look here.
Step 4: Deploy Your Application
Initiate Deployment: Back in the main view of your application, click on
Deployon any of the available environments. Environments is a powerful feature of Divio that allows you to have different stages of your application, such as development (test), production (live) and so forth. For now, let's just deploy the default test environment. For more information on environments, have a look here.Payment Method: You will be asked to provide a payment method if you haven't already. Don't worry, you won't be charged anything, you are in the free trial after all. This is just a security measure to prevent abuse of this plan. Once you've provided the payment method, sit back and relax. Your application is being deployed. You can follow the progress right from the view you're in.
Monitor Deployment: Watch the deployment progress in the current view. Once completed, you can access your application via the newly activated environment URL. That's it! Your chatbot is now live!
Explore Divio's Features
Divio provides you with a lot of features out of the box. We already explored a couple of them such as environments, repositories, webhooks, and both free and custom Divio domains for each environment allowing you to share your application with the world.
What’s next for your chatbot application? Perhaps you’d like to save all those interesting conversations you're having with your chatbot. You will need a database for that, right? Back to the main view of your application, click on Services in the left-hand menu and then on Add service.
PostgreSQL and MySQL databases, object storage (e.g. S3 buckets), and Elasticsearch are just a few of the services Divio offers. Keep in mind that all of those services are configurable on a per-environment basis. This means that you can have a different database for your test and production environments, for example. Flexibility at its best.
Conclusion
In this blog post, we've explored the transformative potential of generative AI and demonstrated how you can harness it to craft your own applications. With the support of Amazon Bedrock and Divio, you're well-equipped to expedite the development and deployment of your AI-driven projects.
By following the outlined steps, you can effortlessly create and deploy a chatbot tailored to your needs. Remember, chatbots represent just a glimpse of the myriad possibilities offered by generative AI. We're genuinely eager to see what innovative solutions you'll develop next!
If you have any questions, want to discuss ideas, or wish to share your experiences, don't hesitate to reach out. We’re here to assist and encourage you as you navigate the exciting world of application development. Happy coding!